
Now to inlay the gold wire for the legs.
 Above, I’ve used an opaque white Sharpie™ permanent felt tip marker to make a background for my drawing, and have drawn in the legs for the first ant.

Using a small 90 degree graver, I’ve cut the legs to the depth and width I want. The legs are especially important because they provide the “character, emotion and expression” for the ants, along with the orientation and relationship of the body segments.

Above, I’ve added undercuts on both sides of the channels I engraved for the legs. I’ve used a small, symmetrical flat chisel and just punched them in. I leave a little gap between each undercut, to help keep the wire from “crawling” along the channel as I inlay it. I’m using a brass punch with roughened face to do the pounding in of the 24 karat gold wire. I roughen the brass punch by tapping it vertically down on a fine grit diamond graver sharpening lap (wheel).

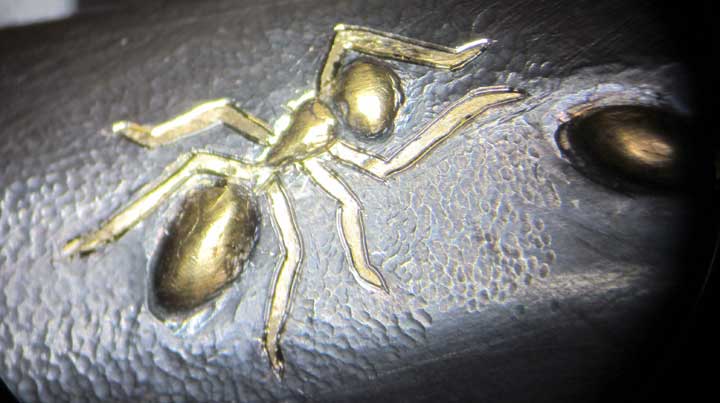
Here’s the gold inlaid into the legs. I’ve punched it down pretty well with the brass punch, and have sort of levelled it off by additional punching. This takes the excess round wire and expands it into gold leaf, which can easily be removed with a small scraper.

Above are the legs after scraping and a quick and dirty patina.
 In order to add additional contrast between the legs and the background, I’ve gone back and engraved VERY fine lines alongside the gold inlays. Later, when I ink the piece, these will add greatly to the appearance.

Here they are, pretty much finished. Now to carve the remaining surfaces.