

Here’s where we left off (above). Today is inlaying the gold into the antennae, and completing the bark around the antennae.
Above, in this view through the microscope, I’ve used a Lindsay Detailing Graver (96 degree V) to cut the distinctive jointed antennae of longhorn beetles, almost like little half dumbbells linked end to end. In the left half of the image, I’ve used a really small flat graver to cut a tiny undercut groove at the bottom of the engraved antenna cuts – I do this by simply driving the graver at about a 45 degree angle to the surface straight into the metal, move along a little less than the width of the graver, and do it again and again. In the above image, I’ve only done this along the top edge, but eventually will work all the way around on both sides. This undercut will provide a space that the annealed and quite soft 24 karat gold wire will flow into, trapping the gold. This undercutting also raises the upper surface of the steel, creating little walls like the piles of dirt along the edge of a freshly dug ditch. I watch for these little “raisings” as I’m cutting the undercuts so I know I’ve made them deep enough.

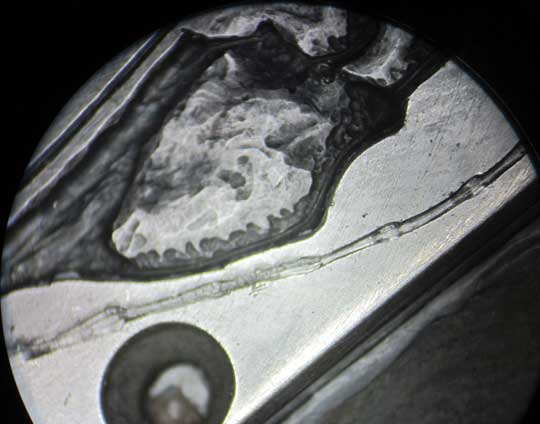
Above, I’m using a small brass punch to drive the gold wire into place. I’ve gently textured the face of the brass punch by tapping it into a 600 grit diamond lap, so it really grips the gold and helps squash it into place. While taking this picture, I was able to completely rely on the short portion of gold driven into place to keep the rest of the gold wire from falling off the vise.

Here’s an overall image what has happened so far. I’ve done a little extra work with the brass punch, making certain the gold is seated well, and hammering the excess into gold leaf. This really thin gold is easy to fold up along it’s edge and use a sharp blade to cut it off, being certain to reclaim the waste gold.

I now need to scrape off the remaining excess gold (there’s not much at this point) and lower those raised steel edges as well. I’ve decided to use a tiny scraper I made from hardened piano wire (you can see it in the above image). These scrapers are much like Japanese “hisage” scrapers used for hundreds of years in their classic metalwork, and they are really growing on me!

Above, both the gold and the surrounding steel has been leveled, but most gold inlays need more contrast than what we have here.

So, above I’ve used a tiny v graver to cut very small lines in the steel (NOT the gold) along the edges, and then cut across to form the joints of the antenna. A lot better contrast, don’t you think?


And, above, two views showing those tiny cuts from several different viewpoints.

Above
, I couldn’t resist a quick inking to see how they will eventually look – providing cuts for the ink to settle into is the actual reason for the outlines. Looking good, so now I have to carve the bark and trim up the antennae.

And, here above, two views of the finished antennae and bark. I’m pleased!
Thanks for looking!