
Well, the owl worked out so well, I decided a hummingbird was in order. If you recall the “encouraging failure” from the first post in this series, I used the copper sheet pressing from that to chase a small hummingbird skull. That became the model for a press die.

The original “encouraging failure,” above.

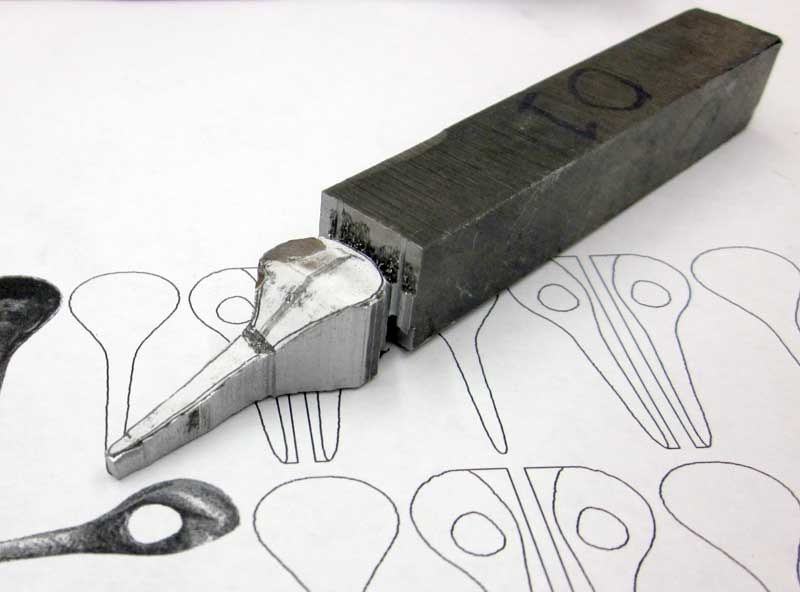
Above, I’ve begun cutting out the hummingbird press die from a 5/8 x 5/8 inch square piece of O-1 carbon steel I normally use for making my knives. Why O-1 and not mild steel? I had it on hand and it was the right size. No other reason…


The above two images are of the finished press die and the original “encouraging failure” hummingbird skull. Note that I’ve drilled and tapped a 10-32 hole through the skull of the press die, before I cut out the profiles of the hummingbird skull. That will hold the skull securely to the “pusher” I’ll turn from aluminum.

Above is the first copper sheet pressing on the die. Since this is a considerably smaller die than the owl skull, it only took three pressings to get this far rather than the four it took for the owl.

Above, the completed die and the completed first pressing.

There’s been a little madness to my method here. Above, I’ve made another pressing and am going to shorten the beak to make a tiny raven skull. If you think about it, this partially-formed hummingbird skull shape is pretty generic for a lot of different birds, if you ignore the long beak. You can also see the specialty pitch block I made up for this press die as well.
By the way, I made the press die extra tall just for this reason. There are a lot of different bird skull this basic form will be appropriate for, saving me a bit of labor making different press dies.


The above two images show the press die, a normal pressing and the finished raven skull.
 Above, I’ve completed a copper humming bird skull and a silver version as well. Now to make a pendant from the silver one. I don’t know what the copper one will become yet.
I guess I should also tell you that after cutting the hummingbird skull free from the metal sheet, I take it to the anvil and carefully forge the open bottom of the beak closed on the anvil, with a tiny hammer. Picture a tapered tube, with overlapping bottom edge. Note that I don’t do that for the raven-style beak.
Thanks for looking!