
William Henry B12 Koi and Waves Knife Work-in-ProgressTutorial
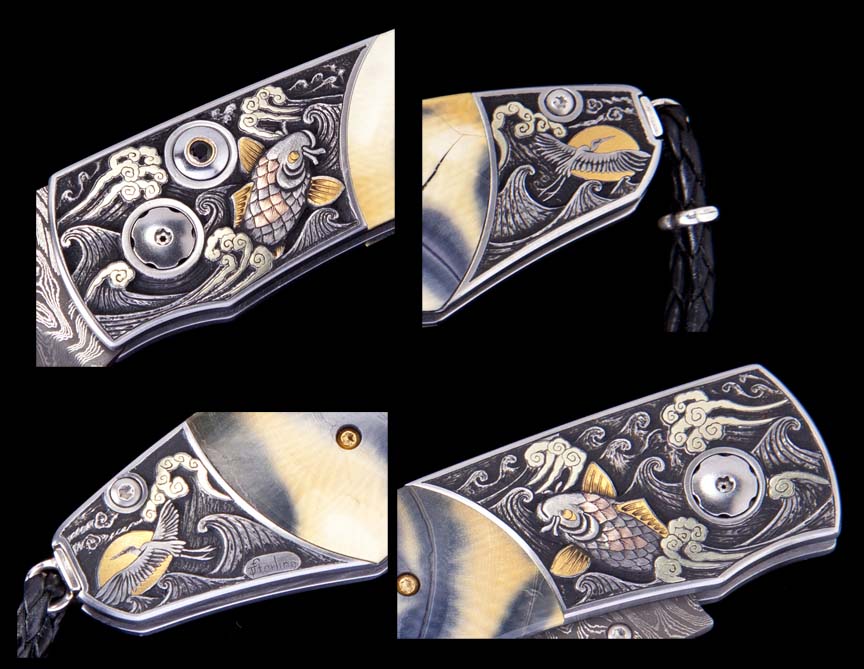
The images above are of the finished knife, and courtesy of the good folks at http://www.williamhenry.com.

A new project – a Japanese-style Koi and Waves for the good folks at William Henry Knives. This is a four bolster B12 model, and will have three colors of inlaid gold – 14 karat green and red, and 24 karat yellow gold. Here are several stages of inlaying the green gold foam…
 Beginning the sculpting process. A long way to go yet…
 Sculpting the koi and inlaying 14 karat red gold in some of the fish scales. Red gold is a major pain to inlay and very risky – it work-hardens instantly, so if your first hit goes awry, it’s all over…but the color is so fantastic , it’s worth it!
 All the gold inlays are in – 3 colors of gold in 11 inlays…probably one other day to go on this, then 3 more bolsters. No rest for the wicked!
 Finished detailing the koi. All that’s left on this bolster is to detail the green gold foam (three more bolsters though). Just couldn’t push on to the finish today. Whew!
 Finished the front bolster. The small view is (hopefully…) about life size (computer or tablet). 11 inlays, in 3 colors of gold. Next to start on the rear bolster, then another complete side after that!
 There’s been a small delay since the last step. I have been working on a design for the rear bolster of the Koi and Waves William Henry Knife. In the upper left is a test piece I made – in person, the heron and rising sun is spectacular (yay me!) and the large wave on the left is a total FAIL. Hence the redesign on the actual bolster below. If you wonder why engraving is expensive, here’s a great example. It’s not the cutting, it’s the agonizing hours spent designing, followed by redesign, and redesigning again…and tiny, awkward areas increase the difficulty tenfold…
 The main steps installing green and 24 karat yellow gold inlays in the rear bolster. The yellow is wonderful to work with, not so wonderful the 14 karat green gold…
 Side A of the William Henry Koi and Waves completed. Here’s the lovely cream and blue fossil mammoth scale installed. I’ve got Side B mounted and ready to add the heron to the Side B rear bolster since I’m already trained up on the design. Then on to the front bolster…
 The Side B rear bolster inlays are in – that’s a 600 grit diemaker’s stone in a pencil holder that I use to stone the inlays flush with the steel.
 OK, I’ll be taking a small break to go play at our local annual Knap-In (stone tool making), so I’ve been ordered to get back to work by my better half and finish this bolster before I can go…so, gold inlays are in, stoned and trimmed, and now I’m removing background. You can see the tiny carbide burs I use to carve out the background.
 Well, the big Knap-In is over, so it’s back to the grind… We’re on the home stretch with the last Side B bolster of the William Henry “Koi and Waves.” Note that Side B doesn’t have a blade lock button hole, so that changes the design a little bit. Also, an added difficulty of a lock button clearance pocket on the backside, so I have to be careful over the resulting thin area not to cut through! Tomorrow, the green gold foam inlays…
 Finished the green gold foam inlays – top left then clockwise: pocket excavated and undercut, bottom stippled, 3 green gold wires installed, more wires, all wires installed, gold heavily punched into the pocket, stoned flat.
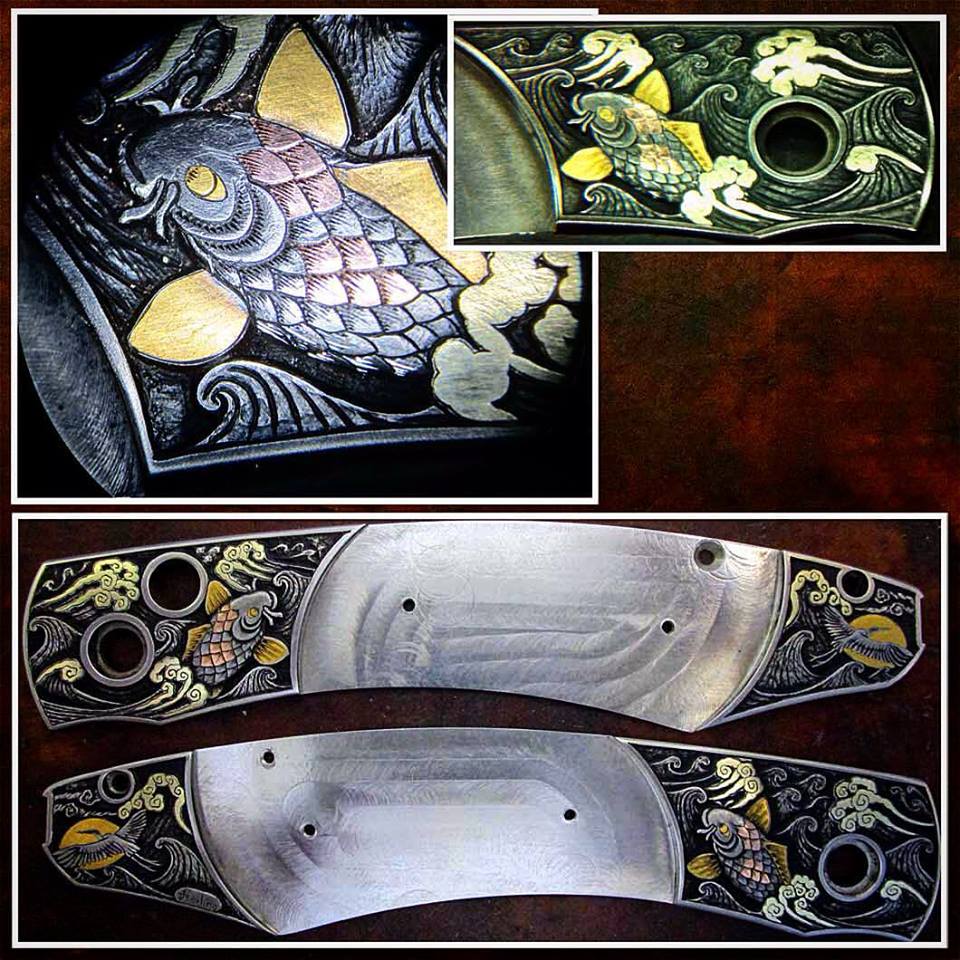
 Sculpting the waves and koi. Top left is the flat koi, bottom left is fully sculpted to round. Tomorrow, the remaining 6 gold inlays go in. Two of them are red gold – awful stuff to inlay!
 The Fates have been conspiring to keep me away from this. The electricity is finally back on after three days and 2 and 1/2 nights of storm outage…tired of the dark, missing my studio (not enough light), and looking forward to a hot shower as soon as the water is hot…
Between Knap-Ins, our 3 day power outage and attending the West Coast Engraver’s Confabulation last weekend, I’m really behind the power curve on this one… Here I’m adding in 24 karat gold wire inlay in the koi’s left pectoral fin.
 All the gold inlays are in place, now I just need to trim around the inlays, a little carving cleanup, and add in wave force lines. A day and a half and this one will be ready to ship!
 All the gold inlays are installed and the distance waves are completed. All that’s left is detailing the gold and inking!
 Finished, with a couple of in-work views! They’re off to the good folks at William Henry Knives tomorrow.
The images above are of the finished knife, and courtesy of the good folks at http://www.williamhenry.com.
Thanks for Looking!
Tom Sterling
http://www.facebook.com/TomSterlingHandEngraving#
http://instagram.com/tom_sterling_hand_engraving