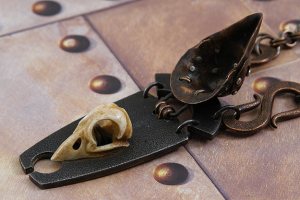


 Above images courtesy of BladeGallery.com
 And a work-in-progress image of my own.
In the past I’ve experimented with carving bird skulls from antler, and some with small helmets. While they proved popular, all of the above works were terribly labor intensive. While stumbling around the Internet, I found some videos from Rio Grande jewelry supply showing the Bonny Doon Press in operation. This started ideas rolling around in my noggin, and a little more research led me to PotterUSA.com and their inexpensive jewelry presses and contained urethane. Since I already have a small 20 ton hydraulic press I use for bladesmithing, that added fuel to the fire, and here we are. Here’s a little hint – since many bladesmiths have a hydraulic press for forging, they might take note that this process could easily be adapted to create silhouette dies that could be used to make metal halves of sheaths. Here’s a pretty decent video about silhouette dies by Melissa Muir – bladesmiths take note of the possibilities…

Above is my (semi) finished first success. It was a bit of a winding road, but I seem to have broken at least some of the code. I can now make multiples of this design, with maybe 70% less work for each. Here’s how I got there…

Above is my first attempt, something I think of as an encouraging failure. I carved a positive bird skull shape in walnut (grain oriented vertically) and glued it onto a 2 inch diameter, 1 inch thick circle of walnut (grain oriented horizontally). The press squashed it like a soft rubber hockey puck. But, the small sheet of copper I used was partially shaped well enough to encourage me to make a metal die.
I decided on an owl skull, since my contained urethane is only 2 inches in diameter, and owl skulls are round rather than long. I figured I could make a pressing large enough to make a pendant sized piece.

Here is my pattern and research material.

Above is the beginning of the owl skull form, sawed from a 1 x 1 inch square mild steel bar. You can also see my PotterUSA contained urethane in this image. This little plug of urethane is quite hard, I’m unable to dent it with my finger, but it will serve as the resistance medium to form thin copper sheet around the owl skull form.

Here’s one side partly ground with an angle grinder. I’m leaving the skull attached to the bar to help hold this slippery little thing…

I’ve drilled an tapped a hole in the bottom to hold the skull onto a metal plate during pressing.

Partly ground – note the center line I’ve drawn on with Sharpie permanent marker to try and keep both sides identical. I often use red Sharpie because it doesn’t show blood as easily…

More grinding and a few features drawn in.

This is as far as I can go with the angle grinder.

Above, another center line and additional features.

Here I’ve begun adding inthe eyes with my NSK micromotor and carbide burrs. Note that I’m not carving anything below the halfway mark – if I carve there, the urethane will force copper into the concave spaces, trapping my form after pressing. That would probably cause damage to either the copper sheet or the form itself trying to remove the pressing.
 The other side – same story, different day…

Above, I’m using a small drum sander to finesse the shape and smooth the surface.

Now I’ve cut the skull from the steel bar, ready to file and grind the back side.


The above two images – using coarse ScotchBrite™ and jewelers files to refine and smooth everything. I want the form to be smooth, but I don’t think it needs to be polished.


The above two images, the finished form left and right sides.


wow! absolutely fascinating! you’re very talented!
<a href="”>LaserNett
Hello Tom
I’d like to thank you for all the information you’ve made available from your art forms & technics and your willingness too share. I’ve been a big fan of your work for several years.
Recently I’ve been reading your muse on press forming as it coincided with some of my interests and thought I’d pass along the following info. Thought it might be of interest.
http://www.ganoksin.com/borisat/nenam/practical-die-forming.htm
Sincerely
Larry Ross
Hi Larry,
Thanks for the kind words and the interesting link at ganoskin. I’ll have to look into the Devcon epoxy mold stuff.
Thanks!
Tom
Pingback: “Have You Heard the Owl Call Your Name?” Art Basket | Metal Musings Blog