
Making a Copper Overlay
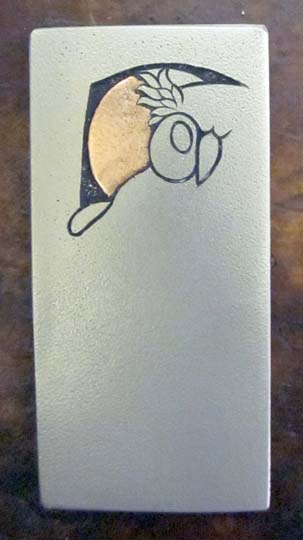
I’ve been away from engraving for a few weeks, and I decided I needed to practice up a bit before starting on a knife commission. This is an extension of a knife design I intend to engrave in a few weeks, and I thought it would make both a nice pendant, and be a good practice piece to get my hand back into the swing of things. I decided the moon behind the owl’s face would look good in copper and make a nice contrast to the grey of the titanium pendant. Incidentally, this pendant is about 2 1/4 inches tall (about 57 mm).

Above is the finished pendant, in Grade 2 titanium, copper, and 24 karat gold, with silver hardware.

Above is a copper overlay practice piece for the practice piece, and my very first overlay! Overlays are actually pretty simple in concept, but take a bit of practice to get right. One simply makes an entire forest of tiny, sharp hooks in the parent metal, and then pound a softer metal down into those hooks. If you’ve done it right, the little hooks will sink into the softer overlay metal, and then bend over, trapping the overlay. Unlike inlays, overlays sit on top of the parent metal, where inlays continue down below the surface. Overlays are best used for light duty items which won’t get a lot of abuse. Overlays might not be the best thing for engraved firearms, where the pounding shock caused by shooting might loosen them.

Above, I’ve indicated how I begin to make my forest of tiny hooks. Using a flat graver, I cut lots of parallel lines, holding the graver at about 45 degrees to the surface of the metal. When I’ve cut parallel lines all across the surface to be overlaid, I then change direction by about 45 degrees and cut more parallel lines. I did this for three successive layers, and was able to get the overlay to stick quite nicely.

Above, I’ve prepared the surface of the moon by cutting it lower than the surface of the owl face, and added several shallow craters. Now, I’m ready to begin cutting the tiny forest of hooks.
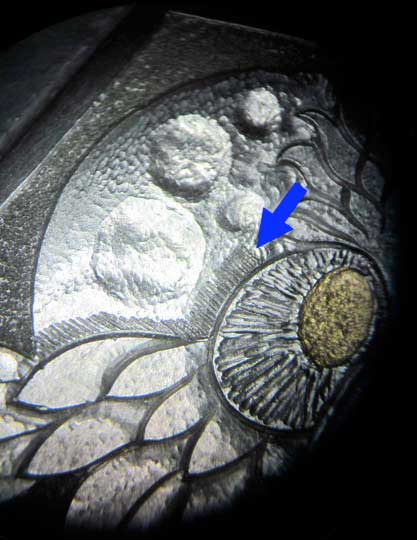
Above, you can see where I’ve begun cutting the parallel line cuts, using a small flat graver. I’m cutting from top to bottom, starting at the blue arrow.
Another view of the first row of cuts, above.

Here, I’ve finished covering the entire surface of the moos with parallel cuts, raising a small bur each time. It feels about as rough as a fingernail file.


Above, a more magnified view, and the entire pendant at this point.

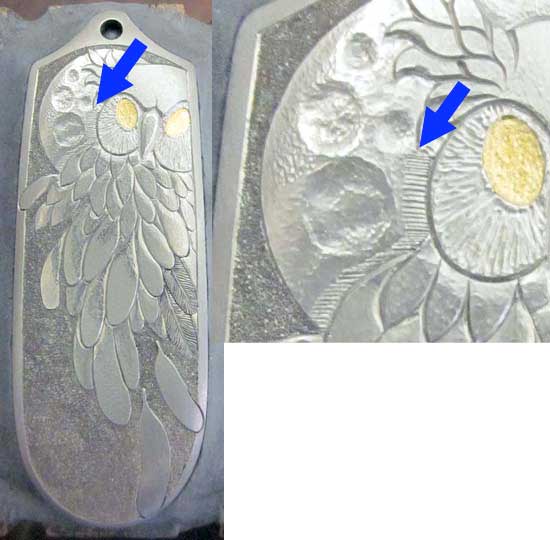
Here I’ve begun the second layer of cuts, at 45 degrees to the first group. I’m careful to cut AGAINST the raised burs of the first layer – our aim is to raise lots of burs, not knock them down. I’ve started at the blue arrow, and worked down.

A more magnified view.

And, above, the entire surface finished with the second layer of cuts. It is now so rough, you can sand bits of skin off with it.

Above, the overall view of the second layer.

Now for the last (third) layer. These end up perpendicular to the first layer. It is difficult to see these as lines of cuts, because they are beginning to become lots and lots of individual burs.

A more magnified view of the beginning of the third layer.

Above, the entire third layer completed.

And, above, the entire pendant view. We’re ready to add the copper foil overlay at this point.

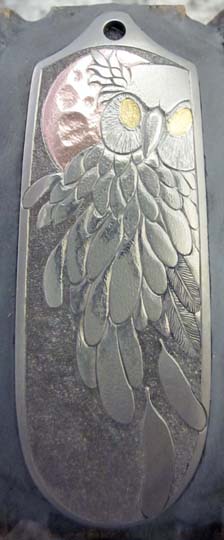
Above, I’ve used a brass punch to drive 1.25 mil copper foil into the forest of hooks. I used a smaller brass punch to get into the tight spots. Note that I’ve carefully annealed the copper foil to make it as soft as possible, and cleaned most of the scale off. If you’ve done the forest of hooks correctly, the foil should stick quite easily. If not, you’ve done something wrong……..By the way, this copper foil is the kind used for stained glass. This stuff had a self adhesive film on it, but it burned away just fine when I annealed the copper.

And, above, an overall view. I’ll use a sharp scalpel to carefully cut around the edge of the moon and cut away the extra foil. I’m careful to cut away from the edges, so I don’t inadvertently pull up an edge of copper.

Once I had the extra copper removed
, I used a steel punch to really force the copper into the hooks, and bend them down as well, so the copper is really well trapped and secured. I followed that with a little steel wool and burnishing with a carbide burnisher.

Above, you can see the finished overlay and the three punches I used – two brass and one steel (made from a broken rotary bur).
And, above, ready for detailed engraving.
For more information about overlays, try these excellent links by Sam Alfano:
http://www.igraver.com/gold_overlay/index.shtml
http://www.engraverscafe.com/showthread.php?1904-Gold-overlay-variation
Thanks for Looking!