
 Starting a tactical bead with a piece of wrought iron anchor chain from the late 1800s. A huge pain to true up this wonky thing in the lathe…lower left, a chunk of the original and the turned piece. I didn’t ruin the carbide lathe cutter insert – I took it really slow, and got lucky! But I won’t be doing it this way again…ever. I should have heated it to welding temp and twisted it really tight, as well as forging it smaller in diameter.
 Moved to a smaller lathe, cutting the basic shape of the tactical bead. Notice the rough pits full of forge welding flux slag left by manufacturing defects of the original wrought iron (top left image). Ironically, these defects are what gives this ancient wrought iron it’s desirable character…

Hand carving the vertical flutes in the wrought iron grenade body with carbide bur. Lower left after pretty deep etching, lower right with the model and the finished grenade body.

Finished turning the other two bits of the grenade bead in the lathe
, of copper and brass. Lower right image shows chasing the bottom of the brass central rivet.

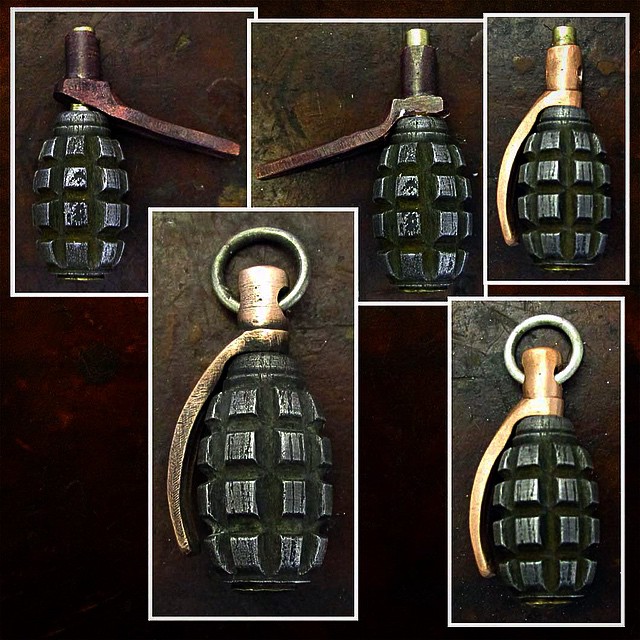
Cutting and bending the copper arming lever was something of a trick..I held the piece in a Jorgensen clamp for gross cutting, and figured out a cute trick with the drill bit I used in the lathe for the major bend (center image). Anyway, it all worked, in a blind squirrel moment!

And here’s the Grenade Bead in final stages, and lower left, finished. It’s a tiny bit over 7/8ths of an inch tall (not including the silver ring) and 5/8ths wide. The grenade body is hand turned and carved late 19th century wrought iron, heavily etched to reveal the wrought texture, with a brass central core, copper arming lever and silver pin ring. I’ve used a little artistic license to slightly rearrange the pin ring to form a better bead. It is based on a Russian model used since WW II.
It’s not designed to come apart, but if you were to clip the soldered ring off, then it would disassemble. The ring (thick silver, soldered closed) is where the cord is designed to attach. It’s signed with my mark on the bottom of the central brass post (solid core, no central hole).
Thanks for looking and all of your support!
Tom Sterling
http://www.facebook.com/TomSterlingHandEngraving#
http://instagram.com/tom_sterling_hand_engraving
http://sterlingsculptures.com/wp/