Engraving a Serge Panchenko Bean Knife “Koi and Waves”

Serge_Koi_and_Waves_Bean_Knife_5Serge_Koi_and_Waves_Bean_Knife_6Serge_Koi_and_Waves_Bean_Knife_7
Above, Serge finished making the other parts and assembled the completed knife.  Photos courtesy of sergeknives.com.

Serge_Koi_and_Waves_Bean_Knife_1

Starting another sergeknives.com collaboration on a sweet bronze Bean knife scale, this time with a Japanese-style Koi and Waves theme. There will be a few dots of gold, and a gold koi eye.

Serge_Koi_and_Waves_Bean_Knife_2
Sculpting the waves and the koi. It’s starting to look like something now!

Serge_Koi_and_Waves_Bean_Knife_3
I textured all the wave surfaces today

, as well as finished the 24 karat gold inlays.

Serge_Koi_and_Waves_Bean_Knife_4
sergeknives.com “Koi and Waves” Bean knife scale is finished! Back to Serge on Monday for assembly, I can’t wait to see how the whole package turns out… Both signatures on the backside, ’cause I couldn’t bear to interfere with the front…

Thanks for looking!

Tom Sterling

http://www.facebook.com/TomSterlingHandEngraving#
http://instagram.com/tom_sterling_hand_engraving
http://sterlingsculptures.com/wp/


Posted in Carving, Engraved Knife | Tagged , , , | Leave a comment

Engraving a Serge Panchenko Bean Knife “Dogfish”

Serge_Dogfish_Bean_Knife_1
Starting a new engraving project on one of Serge Panchenko’s sweet little Bean folding knives (sergeknives.com). This Bean knife scale is in bronze, and is a dream to cut. Just a bit under three inches long.

Serge_Dogfish_Bean_Knife_2
Adding in the 24 karat gold inlays in the undulating bull kelp fronds. L to R , undercutting the pockets, pounding in the gold wire, trimming it back.

Serge_Dogfish_Bean_Knife_3
Spent the day doing ophthalmology and dentistry on sergeknives.com collaboration NW-style Dogfish. Upper left, undercut and heavily stippled with a little trick for inlaying gold wire in round spots. Then, various stages of pounding in and trimming the inlaid gold.

Serge_Dogfish_Bean_Knife_4
Finished trimming out the gold inlays today. Next, background removal and stippling, and then it will be back to Serge for assembly…

Serge_Dogfish_Bean_Knife_5
serge knives.com Bean folding knife NW-style Dogfish finished! Left image before detailing and inking, right side finished.

Thanks for looking!

Tom Sterling

http://www.facebook.com/TomSterlingHandEngraving#
http://instagram.com/tom_sterling_hand_engraving
http://sterlingsculptures.com/wp/

Posted in Carving, Engraved Knife | Tagged , , , | Leave a comment

“Bad Day at Green River” Pendant

93309_1_b93309_2_bAbove images courtesy of Bladegallery.com

Fossil_Fish_Pendant_1Starting a new experiment with engraved fossils – the “Bad Day at Green River” pendant. Titanium

, about 2 inches tall, with 24 karat gold inlays.

Fossil_Fish_Pendant_2
Upper left, inlaid gold with no embellishment. Lower right, engraving very tiny (almost invisible) lines in the titanium just outside the gold really makes it pop.

Fossil_Fish_Pendant_3
Adding more little fossil fishes…

Fossil_Fish_Pendant_4
Adding in the stone finish and cutting away the recesses simulating layered stone, the top left fish fossil has the background finished like I’m planning.

Fossil_Fish_Pendant_5
Almost done! A quick inking with burnt umber to warm it up a little and bring out the gold. Now I have to ponder it for a while…

Fossil_Fish_Pendant_6
“Bad Day at Green River” pendant finished. Hand engraved and carved titanium, 24 karat gold inlays, silver hardware, leather neck cord. Thanks for looking and all the support!

Thanks for looking!

Tom Sterling

http://www.facebook.com/TomSterlingHandEngraving#
http://instagram.com/tom_sterling_hand_engraving
http://sterlingsculptures.com/wp/

Posted in Jewelry, Pendant | Tagged , , | Leave a comment

Steelhead and Buckskin Pouch – for Renee

Renee wanted to know if I had any of these little carved moose antler fish for sale.  Unfortunately, for health reasons I no longer carve any kind of natural materials, so I don’t have any of the fish for sale.  She made a buckskin pouch and  also thought she might try her hand at carving her own little fish dangles.

So, thanks for the kind words Renee, and here are some better photos of the little carved

Gutted_Steelhead_Buckskin_Pouch_9 Gutted_Steelhead_Buckskin_Pouch_1

Posted in Carving, Jewelry, Netsuke | Tagged , , , , | 2 Comments

Russian Grenade Tactical Bead

Russian_Grenade_Bead_Web_1 Starting a tactical bead with a piece of wrought iron anchor chain from the late 1800s. A huge pain to true up this wonky thing in the lathe…lower left, a chunk of the original and the turned piece.  I didn’t ruin the carbide lathe cutter insert – I took it really slow, and got lucky! But I won’t be doing it this way again…ever. I should have heated it to welding temp and twisted it really tight, as well as forging it smaller in diameter.

Russian_Grenade_Bead_Web_2Moved to a smaller lathe, cutting the basic shape of the tactical bead.  Notice the rough pits full of forge welding flux slag left by manufacturing defects of the original wrought iron (top left image).  Ironically, these defects are what gives this ancient wrought iron it’s desirable character…

Russian_Grenade_Bead_Web_3
Hand carving the vertical flutes in the wrought iron grenade body with carbide bur. Lower left after pretty deep etching, lower right with the model and the finished grenade body.

Russian_Grenade_Bead_Web_4
Finished turning the other two bits of the grenade bead in the lathe

, of copper and brass. Lower right image shows chasing the bottom of the brass central rivet.

Russian_Grenade_Bead_Web_5
Cutting and bending the copper arming lever was something of a trick..I held the piece in a Jorgensen clamp for gross cutting, and figured out a cute trick with the drill bit I used in the lathe for the major bend (center image). Anyway, it all worked, in a blind squirrel moment!

Russian_Grenade_Bead_Web_6
And here’s the Grenade Bead in final stages, and lower left, finished.  It’s a tiny bit over 7/8ths of an inch tall (not including the silver ring) and 5/8ths wide.  The grenade body is hand turned and carved late 19th century wrought iron, heavily etched to reveal the wrought texture, with a brass central core, copper arming lever and silver pin ring.  I’ve used a little artistic license to slightly rearrange the pin ring to form a better bead.  It is based on a Russian model used since WW II.

It’s not designed to come apart, but if you were to clip the soldered ring off, then it would disassemble.  The ring (thick silver, soldered closed) is where the cord is designed to attach.  It’s signed with my mark on the bottom of the central brass post (solid core, no central hole).

Thanks for looking and all of your support!

Tom Sterling

http://www.facebook.com/TomSterlingHandEngraving#
http://instagram.com/tom_sterling_hand_engraving
http://sterlingsculptures.com/wp/


Posted in Carving, Jewelry | Tagged , , | Leave a comment

Gold Frog Skeleton Dog Tag

93310_2_b93310_1_b
Above images courtesy of Bladegallery.com

Gold_Frog_Skeleton_Pendant_WR_1
I’m working on an experiment based on the Frog Skeleton key tag I engraved not long ago. Clockwise , rough cut titanium mini-dogtag, my filing setup (Jorgensen woodworking clamp), the tag ready for engraving, and in the vise under the microscope.

Gold_Frog_Skeleton_Pendant_WR_2 Clockwise, engraving the lines, removing the material inside the lines, inlaying 24 karat gold in the toes, removing excess gold, and inlaid in the leg bones.

Gold_Frog_Skeleton_Pendant_WR_4 Inlaying more gold…

Gold_Frog_Skeleton_Pendant_WR_5
Clockwise: inlaying wire in the backbone and skull, using a punch to imbed and flatten the gold, using a scraper to remove the excess, burnished and steel wooled. When all of the gold is inlaid, I’ll stone it flat and flush, and carve away the background…

Gold_Frog_Skeleton_Pendant_WR_6 Finishing up the 24 karat gold inlays: preparing the arm cavities, pounding in the gold, scraping and burnishing the gold smooth.

Gold_Frog_Skeleton_Pendant_WR_7
Stoning with 600 grit to flatten the gold flush with the surface, then 1200 grit, then steel wool, followed by tiny cuts to true up the outlines. Now I’m ready to begin removing the background…

Gold_Frog_Skeleton_Pendant_WR_8
Halfway through background removal…whew!

Gold_Frog_Skeleton_Pendant_WR_9
Left to right, removing the background, background completely gone, and about half the stippling finished (lower half). Tomorrow, finish the stippling and detail the gold frog, and we’re finished!

Gold_Frog_Skeleton_Pendant_WR_10
Here’s the Gold Frog Skeleton Pendant (catchy name, that…) all finished. Mini 2/3rds sized dogtag in Grade 2 titanium, with 24 karat gold inlay. Elegance for a man, or bold yet elegant statement for a lady!

Gold_Frog_Skeleton_Pendant_WR_11And the glamour shot!

Thanks for looking, and all of your support.

Tom Sterling

http://www.facebook.com/TomSterlingHandEngraving#
http://instagram.com/tom_sterling_hand_engraving


Posted in Jewelry, Pendant | Tagged , , , , | Leave a comment

A Tale of Two Ravens

A Tale of Two Ravens (dogtag pendants by Tom Sterling, March 2015)

Raven_Dogtag_2dRaven_Silver_Helmet_Dogtag_10
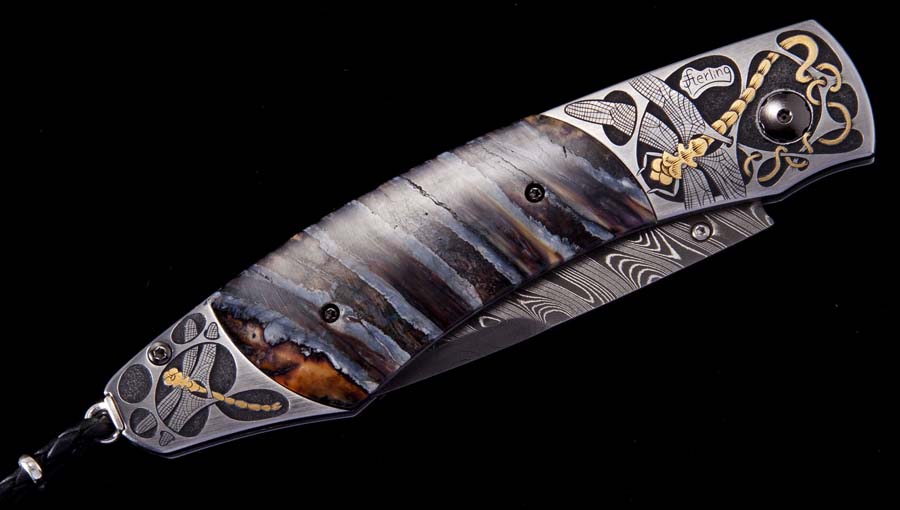
Top left image by Serge Panchenko (check out his excellent work at http://sergeknives.com)

Above is an excellent example of why I’ve been pursuing the press forming process. My intention is to produce a series of works beginning from a common start point, and individualizing each one, hopefully removing a significant bit of the labor involved.

I’ve always been jealous of the 2D arts and their ability to produce a single painting, drawing or photograph and then retire by selling prints of that same image. OK, I’m exaggerating about the “retiring” part, but you get the point. The art world calls these “multiples” and it’s great work if you can get it. Perhaps one day 3D printing in art metals will be as affordable as inkjet color prints (OK

, Giclée for the art savvy) , but until that day, here we are…

Raven_Silver_Helmet_Dogtag_0
Upper left then clockwise: We start with a positive (male) mold (technical term: die) for a press-formed raven dogtag, here carved from a steel bar. I’ll eventually press thin copper or silver over this steel mold…

Raven_Silver_Helmet_Dogtag_1
The mold is almost complete (above) – I just need to smooth the back side of the raven’s head.

Raven_Silver_Helmet_Dogtag_1a
Here’s the finished raven mold in the press, and beginning the pressing process.

Raven_Silver_Helmet_Dogtag_2
It took four separate pressings, with hammering out wrinkles, annealing and pickling (dissolving the black oxides from the copper) in between, to get the pressing ready for chasing and engraving…

This is the decision nexus, the point where each raven tag would go its’ own separate way to be individualized. We’ll continue on with the basic raven dogleg now…

Raven_Dogtag_2a
From the rather undistinguished generic raven head in the previous image, we begin to chase the details in, followed by engraving. Next, I’ll apply a titanium backing to make a dogtag pendant.

Raven_Dogtag_2b
Above, I’ve used a miniature copy of a blacksmith’s nail header to make rivets out of sterling silver wire. In the lower right corner, you can see the titanium backing installed with four silver rivets. Now I just need to live with it for a while to see if I’m finished, or if it needs something else added.

Raven_Dogtag_2c
And here is the Raven Dogtag completed!

Raven_Dogtag_2d
Again, the glamor shot by Serge Panchenko (http://sergeknives.com)

Raven_Silver_Helmet_Dogtag_3
Here we’re going to follow the tale of the second raven. We’ll begin exactly like the first raven by pressing the raven head from copper sheet. To make the silver helmet, I began with a pressed generic copper raven head. Placing the copper raven over the steel die, I re-pressed the head with an additional sheet of sterling silver to begin forming the silver helmet.  This will give me a second raven head in a different colored metal, that fits like a glove. Like the copper raven head, multiple pressings, wrinkle hammering, annealing and pickings were required.

Raven_Silver_Helmet_Dogtag_4
Here’s a closeup with the helmet margins drawn on the silver sheet, ready for trimming.

Raven_Silver_Helmet_Dogtag_4a
Taking the pressed silver sheet all the way to a refined helmet is quite a bit of work. Above, I trimmed away everything that didn’t look like a helmet with a jeweler’s saw, then carefully refined the edges with tiny jeweler’s files. By the way, cutting out this very involved 3D shape with the saw is anything but straightforward – there are lots of awkward angles, and a fair bit of bad language is involved…  Finally, I silver soldered the helmet to the copper raven head and mounted the head on a pitch block for ready for chasing and engraving (pitch is the icky green looking stuff on the block of wood, and holds the piece securely while working).

Raven_Silver_Helmet_Dogtag_5
Chasing in the details (mostly around the eyes), and engraving the silver helmet. I engraved cuts defining the areas to be textured with a Lindsay Airgraver™ and then texture the interior areas with a tiny carbide ball bur in an NSK Electer micromotor grinder.

Raven_Silver_Helmet_Dogtag_6
Above is the finished the head and helmet. It has taken me two days of work to get to this point. Tomorrow, I’ll add the titanium back, and we should be done.

Raven_Silver_Helmet_Dogtag_7
Above, trimming the copper to fit the titanium backplate, drilling and forging rivets, and soldering the big manly silver jump ring closed.

Raven_Silver_Helmet_Dogtag_8
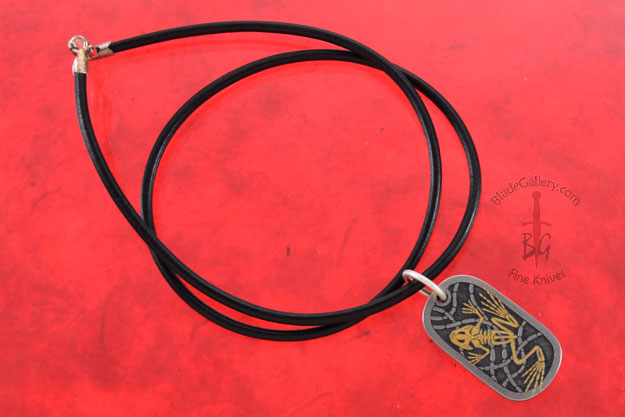
The Raven and Silver Helmet dog tag completed!

Raven_Silver_Helmet_Dogtag_9
And the glamor shot, with a pose blatantly stolen from my friend, Serge Panchenko.

Raven_Silver_Helmet_Dogtag_10
Here is the “Raven with Silver Helmet Dogtag,” 1 7/8 inch long, fabricated from copper and sterling silver, with a titanium back plate, and leather neck cord.

Thanks for all of the support and encouragement!  And, thanks for looking!

Posted in Carving, Jewelry, Pendant, Press Forming, Steampunk | Tagged , , , , , , | Leave a comment

Titanium Frog Skeleton Keychain Tag

Frog_Skeleton_Titanium_Pendant_1Beginning a titanium keytag in Japanese shishiaibori style, with very deep outlines and 3d sculpting inside.  The top left image shows jus a bit of the first cutting with a wide “V” graver, the middle is twice around with decreasingly narrow “V” gravers, and the bottom right image shows all of the outlines at full depth, and beginning to sculpt the head.

The technique starts out with a very deep outline (takes me three times around with three different gravers to get deep enough, and heavily cutting each time). Then, the inside edges are carefully carved back, rounding them over to achieve a 3D look. Obviously, you need to have steeper sides in some areas, and shallower sides in others to achieve the 3D look.

The main point is there is no background removal, as in normal US and European engraving, and all of the design is at or below the surface, so wear and tear on the engraving should be less of a concern.

Frog_Skeleton_Titanium_Pendant_2
Above , the keytag in various states of in-progress and finished.

Frog_Skeleton_Titanium_Pendant_3
The complete titanium (grade 2 Ti) keytag in Japanese shishiaibori technique (carved completely below the surface).

Thanks for looking!

Posted in Carving, Jewelry, Pendant | Tagged , , , | Leave a comment

Yet Another Baby Sea Turtle Pendant

baby_sea_turtle_II_1 Back to work with a baby sea turtle tag.  I swear this is the last one!  Top left then clockwise – cutting out, soldering on silver backing, and rough grinding…

baby_sea_turtle_II_3Upper left image

, deepened the background by twice around the edges with a square graver.  Bottom right image, beginning the sculpting (rounding) with a flat graver.

baby_sea_turtle_II_4
Top left then clockwise – sculpting the shell and head with carbide burs and tiny punches. Not much depth to work with, but fortunately a little goes a long ways…

baby_sea_turtle_II_6
Finished the front side by marking out the turtle tracks, carving them in the textured sand. Bottom, smoothed and final patina. Next, the gold sand dollar on the back.

baby_sea_turtle_II_5
Finishing up the back. From top left then clockwise, creating the pocket for the inlaid gold sand dollar, roughing up the bottom, setting the 24 karat gold wire, smoothing and detailing the sand dollar…

baby_sea_turtle_II_7
Baby Sea Turtle Tag finished! 1.5 inches tall, front is hand engraved and carved stainless steel, sterling silver back with inlaid 24 karat gold sand dollar. Thanks for looking!

Posted in Carving, Jewelry, Pendant | Tagged , , , , | 3 Comments

William Henry Dragonfly Bolster Knife Scales

William Henry Dragonfly Bolster Knife Scales Work-in-Progress
William_Henry_B12_Bolster_Dragonfly_55William_Henry_B12_Bolster_Dragonfly_54
William_Henry_B12_Bolster_Dragonfly_53
The images above are of the finished knife, and courtesy of the good folks at http://www.williamhenry.com.

William_Henry_B12_Bolster_Dragonfly_1 Starting on a William Henry knife scale with dragonfly theme – this is the back end bolster.

William_Henry_B12_Bolster_Dragonfly_2a
Here , I’ve been excavating and undercutting the pocket for the gold inlay.  So far, I’ve inlaid 24 karat gold into half of the body.

William_Henry_B12_Bolster_Dragonfly_2b
The end bolster inlaid with gold and finished.  This is about a day’s engraving for me.  Next, the main themed front bolster…

William_Henry_B12_Bolster_Dragonfly_3 The William Henry front bolster with the major lines engraved…and some of the wispy tail excavated for gold inlay.  It’s about a full day of engraving (for me) to cut the major lines of the front bolster, and excavate the body and looooong tail ready for gold inlay, so this far has taken me two days of work…

William_Henry_B12_Bolster_Dragonfly_4aInlaying gold in the wispy tail – this is pretty easy as inlay goes, since it is just one width of gold wire.

William_Henry_B12_Bolster_Dragonfly_4b
Most of the gold inlaid today…

William_Henry_B12_Bolster_Dragonfly_5 Most of the gold work is finished, except for a bit of shading detail on the dragonfly body at the end…this is the end of day three of engraving…

William_Henry_B12_Bolster_Dragonfly_6a
The gold is in and background being excavated.  Next I’ll stipple the background, detail the wings, then add shadow details to the gold body.  Not long for this side…this is the end of the fourth day.

William_Henry_B12_Bolster_Dragonfly_6b
Finished the background stippling today…Right now the background is just a million tiny holes (stippling). The last thing I will do is to make it even darker by inking the low spots, and wiping it off of the high spots…

William_Henry_B12_Bolster_Dragonfly_8a
With the finished detailing of the wings and the shading of the gold body, this side is finished!  End of day five.

William_Henry_B12_Bolster_Dragonfly_8b
Here’s the finished scale, with the fossil ivory center inlay in place. Very pretty!

William_Henry_B12_Bolster_Dragonfly_9I haven’t been a complete slug over the holidays, and finished the other side of the William Henry dragonfly knife scales.  Here are both sides of the scales.  I took my time on Side B over the Christmas holidays, but I could probably have finished this side (since I’m pretty practiced up on this design!) in four days.

William_Henry_B12_Bolster_Dragonfly_55William_Henry_B12_Bolster_Dragonfly_54William_Henry_B12_Bolster_Dragonfly_53
The images above are of the finished knife, and courtesy of the good folks at http://www.williamhenry.com.

Thanks for looking!

http://www.facebook.com/TomSterlingHandEngraving#
http://instagram.com/tom_sterling_hand_engraving


Posted in Engraved Knife, William Henry knife | Tagged , , , | Leave a comment